All steps in this tutorial are assuming you are logged into your website and located on the dashboard or the main page.
- Navigate to ‘Pages’, and click on a page you would like to add a gallery.
- Click on the rounded plus sign icon and search for Gallery.
- You will have two choices to choose images: upload and media library.
- If you select upload you’re pulling the images from your files, or documents.
- If you select media library, your pulling images from that have already been uploaded into your site.
- Select the images that you want to upload, and fill in the information regarding each image, such as title, description, alt tag, and then select ‘open’ or ‘create gallery’.
- You can further edit the gallery with the options sidebar on the block editor.
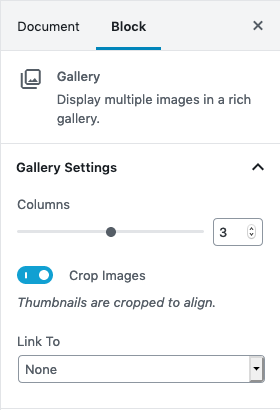
- You can pick how many appears in a column.
- You can have it Crop the images.
- Or, you can have the gallery link to another page.
- Don’t forget to save!